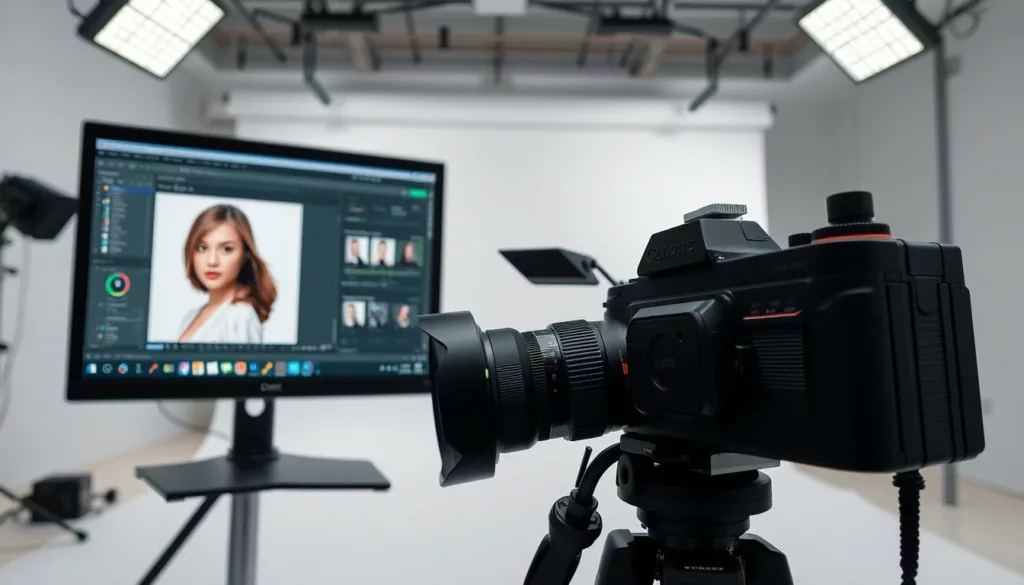
Great product images shape first impressions and drive action online. Clear photos build trust with customers, set accurate expectations, and cut returns by showing true color, scale, and texture.
Strong visual content helps brands stand out in crowded ecommerce categories. Mixing lifestyle shots, detailed close-ups, and 360-degree views meets platform needs and improves discoverability on search and social.
Better photos keep shoppers engaged longer, raise add-to-cart rates, and boost the ROI on marketing spend. This guide lays out practical steps — from lighting and backgrounds to camera settings, editing, and optimization — so a DIY setup can rival studio work.
Expect repeatable workflows, checklists for white balance and file settings, and clear benchmarks for website speed and SEO. Follow along to create consistent images that reflect your brand and convert visitors into loyal customers.
Key Takeaways
- Clear images improve conversions and reduce returns.
- Consistent visuals strengthen brand identity across channels.
- Mix shot types to fit product pages, ads, and social.
- Smart light control and composition yield pro-level results.
- The guide provides checklists for balance, optimization, and scaling.
Why Product Photography Matters for Ecommerce, Marketing, and Brand Trust
Clear, accurate images remove doubt and speed buying decisions on ecommerce sites. When a hero image shows true color, size, and texture, customers feel confident and convert faster.
Conversion, returns, and first impressions
Good visuals cut uncertainty. Crisp photos reduce returns by matching expectations to the actual product. That lowers cost and raises conversion rates.
Multiple image types—featured, thumbnails, zoomable, and 360—help shoppers inspect details at every stage. This shortens the decision cycle and nudges add-ons.
How strong visuals support SEO and discoverability
Optimized images boost search visibility on your website and in image search. Use descriptive file names, proper alt text, and fast file sizes to help discovery.
Consistent visuals across ads, email, and landing pages raise relevance in marketing campaigns and improve ad performance. At scale, a documented style guide preserves lighting, color, and framing so your brand stays recognizable.
- Reduce pre-sale friction with precise representation.
- Schedule seasonal refreshes to keep listings accurate.
Understanding Search Intent: What Readers Want from High-Quality Product Photography Tips
What people really need is a short roadmap: gear you can afford, lighting you can set, and edits you can repeat. Readers want clear steps they can use today to make consistent images for ecommerce listings.
Expect practical guidance—camera setting baselines, exposure and white balance checks, and simple background options that work in tight spaces. We’ll cover fast editing workflows and export rules so your photos load quickly and look true across devices.
Common roadblocks include budget limits, small studios, and inconsistent backgrounds. The fast solution: start with window light, a tripod, and a sweep. Move to softboxes and color control as your business scales.
When to hire a studio: outsource for high volume, complex props, or tight turnaround. For single items and early catalogs, a repeatable DIY process delivers better ROI.
- Quick wins: checklists for setup, camera, and export.
- Skills roadmap: window light → softboxes → color control → retouching.
- Final note: use this short guide to make consistent product photography that converts customers.
Essential Tools: Budget-Friendly Product Photography Gear That Delivers
Start small: affordable gear can produce consistent, sale-ready images. Use the camera you already own and add a few versatile tools to build a reliable kit that scales as your catalog grows.
Cameras and lenses
Begin with any camera—even a smartphone. Upgrade lenses when ready: a 24–70mm f/2.8 for flexibility and a 50mm f/1.8 prime for sharp, natural perspective.
Support, table, and tape
A sturdy tripod locks framing, allows slower shutter speeds, and keeps shots consistent across a series. Look for affordable options under $30 that still hold small rigs.
Use a 24–27 inch table as a compact studio. Painter’s or gaffer’s tape secures sweeps and paper so the background curves smoothly.
Backgrounds, reflectors, and lightboxes
White background options include paper sweeps (easy refresh), poster board (cheap), and vinyl (durable). Each has trade-offs for cleaning and longevity.
Reflectors and white foam boards bounce light into shadows. Black boards deepen edges to add shape. A lightbox works well for small to medium items needing even diffusion; match color temperature for best results.
“A simple reflector card near the subject can soften harsh shadows without adding another light source.”
| Option | Cost | Durability | Best Use |
|---|---|---|---|
| Paper sweep | Low | Low | Quick refresh, clean white shots |
| Poster board | Very low | Low | Small items, demo shots |
| Vinyl | Medium | High | Long runs, easy cleaning |
| Lightbox | Low–Medium | Medium | Small/medium items, even diffusion |
- Choose props that add context but never hide features.
- Use a small reflector card beside the item to shape light and reduce hard shadows.
- Prefer gaffer’s tape to avoid residue and preserve set integrity during multi-shot sessions.
Setting Up a DIY Product Studio at Home
A simple studio near a window gives you controlled natural light that is easy to shape and repeat for consistent images. This approach saves gear costs and improves color and texture with minimal setup.
Positioning and light control. Place your set so the window is about 90 degrees to the table to get soft side light. Turn off all ambient bulbs to avoid mixed color casts. Rotate the subject to 45 degrees or face it toward the window to change shadow depth.
Avoid direct sun; move the table or hang a sheer curtain to diffuse harsh rays. For bulky items, an open garage door can mimic a large, soft window and make scaling easier for a growing business.
Support and workflow. Use a sturdy tripod to lock framing while you restage. Mark table and tripod leg positions with tape so you can reset quickly and keep backgrounds consistent.
Space planning for different sizes
- Leave room to move reflectors and foam boards without bumping the set.
- Create a prep area for dusting, label alignment, and staging so shoots run smoothly.
- Take quick reference photos to confirm light falloff before your main series.
Lighting That Flatters: Natural Light vs. Artificial Light
How you place and shape light decides if a shot feels soft, dramatic, or true-to-color. Small moves change shadow edge and wrap. Closer light softens edges and wraps around a product. Moving the source back makes shadows crisper and increases contrast.
Window light, distance, and shaping with reflectors
Window setups are simple and budget-friendly. Use a white reflector card opposite the window to lift shadow detail and create a subtle contour. Angle the product to make the wrap look natural without adding more lights.
Softboxes, diffusers, and color control with gels
Softboxes and diffusers increase the apparent light size so glossy finishes show fewer hot spots. Gels correct mixed color or add a controlled accent while keeping the product’s true color accurate.
Common lighting mistakes and quick fixes
Turn off room bulbs to avoid mixed color casts. Light tents give even images but can flatten form; add a black card to reintroduce negative fill.
- Deepen shadows with black cards; lift with white reflectors.
- Flag lens flare with a card; stabilize exposure on a tripod.
- Take test shots and check histograms so whites don’t clip.
| Scenario | Issue | Quick Fix |
|---|---|---|
| Window only | Flat look | Use reflector or angle to create contour |
| Glossy surface | Harsh highlights | Move diffuser closer or soften with softbox |
| Mixed bulbs | Color cast | Turn off ambient lights or add gels |
Backgrounds That Make Products Pop
A seamless sweep keeps edges tidy and removes distracting horizon lines. To build one, tape pure white paper or poster board to the wall and let it curve onto the table. The curve removes the visible corner so the subject appears to float against a clean backdrop.
Use pure white paper or poster board when you need fast retouching and precise edges in images. These materials are budget-friendly and easy to swap during a shoot.
Compare options to match your workflow:
| Material | Cost | Durability | Best use |
|---|---|---|---|
| Paper sweep | Low | Low | Quick refresh, pure white background for many small shots |
| Poster board | Very low | Low | Small items, tight budgets, easy handling |
| Vinyl | Medium | High | Long runs, easy cleaning, consistent look |
Pick lifestyle backgrounds when context matters. Scenes with scale or props tell a story and help shoppers imagine use. Keep these setups subtle so the item remains the focal point.
- Choose color that complements the subject without clashing with branding.
- Use wood or linen textures to add warmth while keeping focus on the product’s features.
- Keep matte surfaces to control reflections on glossy finishes.
- Build a swatch library of backgrounds to match campaigns quickly.
Keep height and distance consistent between shots to speed editing. Always take a few test frames to confirm the background improves perceived quality and introduces no unwanted color cast.
Dialing In Camera Settings for Sharp, True-to-Color Product Photos
Start with a clean base exposure so every detail reads true on screen and in print.
Baseline settings: use ISO 100 for the cleanest image and set aperture around f/8–f/11 to keep the whole item in focus. Mount the camera on a tripod and use a remote or timer to avoid shake.
ISO, aperture, shutter speed, and white balance
Choose shutter speed to match available light and tripod stability. Slow speeds work on a tripod; raise shutter if handheld to prevent blur.
Match white balance to the light source or start with Auto and tweak in post for accurate color. Consistent white balance keeps skin tones and packaging true across shots.
RAW vs. JPEG, histograms, and exposure compensation
Shoot RAW for maximum latitude in editing; use high-quality JPEG only for fast workflows. Check the histogram to avoid clipped highlights—bright whites should retain texture.
In Aperture Priority use exposure compensation to nudge brightness on a white set. For reflective items, bracket exposures and use manual focus for fine label detail.
- Create a studio settings preset to speed repeat shoots and keep quality consistent for all photos.
High-Quality Product Photography Tips
A clean, repeatable workflow turns a white sweep into consistent, sale-ready images every time. Start with a short setup checklist so every shoot follows the same routine and delivers predictable results.
A repeatable white background workflow
Set the table near a window at 90 degrees and turn off ambient lights to avoid mixed color. Secure a paper sweep with tape so the horizon disappears behind the item.
Camera settings: ISO 100, WB Auto, and use Manual or Aperture Priority with exposure compensation. Position the product, tidy labels and caps, and remove dust before you shoot.
Using reflector cards to control shadows and shape
Place white foam boards to bounce light into shadow areas for softer contours. A white reflector card close to the subject controls shadow density; add a black card to deepen edge contrast when needed.
Take multiple shots, check the histogram on a larger screen, and adjust the reflector angle until hotspots vanish and the form reads three-dimensional. Document distances and camera height so the step can be repeated, then retouch and export optimized images.
Plan Your Shot List: Angles, Features, and Consistency
A clear shot list turns scattered ideas into a fast, repeatable shoot that covers every angle buyers need. Start with a prioritized list so each SKU leaves the session with consistent coverage.
Core angles to schedule:
- Hero eye-level, 45-degree (three-quarter), high angle, low angle, bird’s-eye, and optional 360 interactive shots.
- Define a minimum set per SKU: front, back, side, scale reference, and a detail shot for key features.
Keep the camera on a tripod and rotate the item rather than moving the rig. This preserves framing and speeds alignment during editing.
Include lifestyle and group photos for bundles to show context and clarify what buyers receive. Reserve macro shots for tactile areas—seams, textures, ports, or fasteners that prove quality.
Track coverage: number each image against the shot list to avoid reshoots. This simple checklist helps photographers stay efficient and ensures every product publishes with the same complete visual story.
Edit and Retouch: From Clean Backgrounds to Polished Images
Begin with culling and global fixes to make subsequent cleanup faster and more predictable. Ingest, rename, and organize files in Lightroom so batches are easy to find. Apply global exposure, contrast, and white balance adjustments first to lock in accurate color across the set.
Use local adjustments to recover highlights, deepen shadows, and preserve texture in fabrics or finishes. Create and save presets in your editing software to keep looks consistent when you shoot multiple lines.
Photoshop cleanup: selections, cloning, healing
Move problem shots to Photoshop for precise cleanup. Use careful selections and refine masks so edges stay crisp without halos. Clone and heal to remove dust, sensor spots, and background seams.
For complex edges, refine the mask and check at 100% to avoid artifacts. Keep layered masters so you can update colorways or recrops later without quality loss.
- Consider AI tools for fast background removal and scene variants.
- When time is tight, outsource repetitive retouching to services like Pixelz or Path; costs range ~ $0.50–$3 per image.
- Maintain a retouch checklist: straighten labels, fix reflections, unify shadows, and clean edges before export.
Optimize Images for Website Speed, SEO, and Social Media
Serve the right file to the browser and you cut load time without sacrificing perceived sharpness.
Determine the container width with browser dev tools and resize images to that pixel width. Export a second file at 1.5× for retina displays (for example: 684 px container → 1026 px export).
Use sRGB to keep color consistent across browsers and devices. Export a high-quality JPEG, then run smart compression (JPEGmini or Save for Web) to get files under 200 KB when possible.
Metadata, naming, and accessibility
Write descriptive alt text that names the product, color, and key feature. Standardize file names with SKU, angle, and color to simplify DAM and site imports.
“Resize to the container, export a 1.5× retina copy, then compress—this single step saves bandwidth and preserves clarity.”
- Keep aspect ratios consistent so grids and product detail pages look uniform.
- Create Open Graph crops for ads and social media placements to avoid awkward crops.
- Build an export preset checklist so teams follow the same step each release.
| Action | Setting | Goal | Tool |
|---|---|---|---|
| Resize | Container px + 1.5× retina | Avoid oversized files | Browser dev tools, Photoshop |
| Color profile | sRGB | Consistent display | Camera/Export settings |
| Compress | Smart compression | <200 KB target | JPEGmini, Save for Web |
| Metadata | Alt text + SKU naming | Accessibility & organization | Site CMS |
Creative Techniques That Stand Out in Ads and Social
Standout creative shots stop scrolling and tell a brand story in a single frame. Use simple, bold concepts that translate well to ads and social media while keeping the item accurate and usable.
Hanging, odd angles, and macro work shift attention. Try suspending the product to reveal shape and edges. Shoot from low or extreme angles so a single shot feels fresh but still readable.
Hanging products, odd angles, and macro storytelling
Explore suspension rigs, clear thread, or clamps to make items float. These setups create motion and let photographers highlight curves and logos.
Pair those moves with macro sequences to show stitching, texture, or interface details. Small close-ups tell a tactile story that supports the main shot.
Reflections, staged backgrounds, and unusual stands
Add mirrors, shallow water, or acrylic to create controlled reflections for depth. Angle the light to avoid stray flares and keep reflections complementary.
Use textured backdrops and geometric stands to add character. Keep color palettes harmonious so the product remains the hero.
Photo manipulation and giving products personality
Use tasteful edits to enhance mood or suggest use without deceiving buyers. Composite subtle elements, fix scale, or add contextual overlays to build narrative.
Capture many variations and document camera and light positions so successful creative shots can be repeated across campaigns.
Scaling Your Photo Workflow: DIY vs. Hiring a Studio
Choosing between in-house shoots and hiring outside photographers hinges on volume, complexity, and turnaround needs. Small teams can keep control and save money by shooting steadily with strict standards. Larger catalogs or tricky materials often push a business toward external help.
Consistency, quality control, and turnaround at scale
Consistency protects your brand. Build a living style guide that lists angles, exposure targets, color checks, editing steps, and file names so images match across channels.
Use shot lists, intake forms, and QC checklists to reduce revisions and speed approvals. Establish SLAs for delivery time, formats, and naming conventions so vendors and internal teams align.
Costs, ROI, and when outsourcing makes sense
Outsourcing can save time and lower costs for tedious or complex work. Pro white-background work typically runs $25–$75 per image. Retouching services range $0.50–$3 per image.
| Service | Typical cost | Best use |
|---|---|---|
| White-background shoots | $25–$75 / image | High volume, consistent ecommerce listings |
| Retouching | $0.50–$3 / image | Dust removal, color corrections |
| Specialty studio work | Varies | Glass, chrome, hero campaigns |
A hybrid model works well: shoot simple SKUs internally and send complex or hero work to a vetted studio roster. Measure ROI by tracking conversion lift, reduced returns, and faster content velocity after standardizing processes.
Conclusion
Finish strong: a clear system for gear, light, and edits saves time and improves buyer trust. Use budget tools, controlled lighting, seamless backgrounds, and precise camera settings to produce consistently sharp product photos.
Create a repeatable workflow—shot lists, a style guide, and preset edits keep color true and elevate perceived quality. Optimize exports so images load fast, help SEO, and raise conversion across ecommerce channels.
Mix DIY shoots with studio partners when scale or complexity demands it. Set measurable goals—conversion lift, return rate, and production time—and schedule your next cycle now with a simple checklist.
Follow this guide and you’ll refine the brand look over time, earn customer trust, and drive more sales through better product photography.
FAQ
What gear do I need to start shooting professional-looking product photos on a budget?
Start with a reliable camera or a recent smartphone, a sturdy tripod, and a basic 24–70mm or 50mm lens if you use a DSLR or mirrorless body. Add a white sweep (paper or vinyl), a light source (window light or affordable LED panels), and reflectors or foam boards to control shadows. Free or low-cost editing software like Adobe Lightroom Mobile or GIMP completes the kit.
How do I create a seamless white background for ecommerce images?
Use a clean sweep—paper, vinyl, or poster board—curved where the surface meets the backdrop to avoid visible corners. Light the background separately when possible so it reads pure white without overexposing the product. Keep the camera angle and product placement consistent to maintain uniformity across shots.
When should I choose natural light versus artificial light?
Use natural window light for soft, flattering results and minimal setup, especially for small to medium items. Choose artificial light—softboxes, LED panels, or strobes—when you need precise color control, consistent output, or faster turnaround in varied conditions. Both work well; pick the source that fits your workflow and control needs.
What camera settings produce sharp, true-to-color images?
Aim for a low ISO (100–400) to reduce noise, a medium aperture (f/5.6–f/11) for depth of field and sharpness, and a shutter speed that prevents blur (use a tripod for slower speeds). Set white balance to match your light source or shoot RAW to adjust later. Check histograms and expose to preserve highlights and shadow detail.
How can I reduce reflections and harsh shadows on glossy items?
Use diffused light—softboxes or a sheer diffusion panel over windows—to soften specular highlights. Position reflectors to fill shadow areas and change angles to move reflections away from the camera. A polarizing filter can help on some surfaces, but careful light placement and diffusion are usually more effective.
What’s a repeatable workflow for shooting consistent white-background images?
Standardize your setup: fixed camera height and angle, consistent lights and settings, same sweep material, and a checklist for exposure and focus. Shoot tethered or use grids and guides to align products. Save presets in your editing software for batch adjustments to color, exposure, and background cleanup.
How do I optimize images for web speed without losing quality?
Resize images to the container width needed on your site and export at 72–150 PPI for web use, keeping a high-quality JPEG or WebP with moderate compression. Convert to sRGB color space, strip unnecessary metadata, and use lazy loading and a content delivery network (CDN) to improve delivery speed.
What shots should be on my ecommerce product list to improve conversions?
Include a clean main shot on white, several angle shots (eye-level, high, low), close-ups of materials and features, scale shots showing size, and lifestyle images that show use context. Add 360° spins or short video where possible to increase buyer confidence.
How do I keep color accurate across different images and devices?
Calibrate your monitor regularly and use color-controlled lighting or daylight-balanced LEDs. Shoot RAW and include a gray card in key shots to set accurate white balance during editing. Export to sRGB for the web to ensure colors display consistently across most devices.
When should I invest in a professional studio or photographer?
Outsource when you need scaled consistency, advanced retouching, complex lighting setups, faster turnaround, or a polished lifestyle look that elevates the brand. Calculate ROI: higher conversion rates and fewer returns can justify studio costs for larger inventories or premium products.
What common editing steps improve product images quickly?
Crop and straighten, adjust exposure and contrast, correct white balance, remove dust and small imperfections with clone/heal tools, and refine edges for a seamless background. Use sharpening and local adjustments selectively, and create presets to speed batch processing.
How can I make product photos stand out on social media and in ads?
Use creative compositions—dynamic angles, props, and textured backgrounds—to tell a story. Experiment with macro shots, reflections, and motion. Keep branding consistent, and tailor aspect ratios and image crop to each platform for maximum impact.
What are quick fixes for common lighting mistakes?
If highlights are clipped, lower exposure or add fill light; for heavy shadows, introduce a reflector or raise ambient light; if color casts appear, set correct white balance or adjust in RAW; and if images are soft, increase aperture sharpness or stabilize the camera with a tripod.
How do I handle bulky or large items in a small home studio?
Plan layout with a larger sweep or shoot neutral backgrounds in sections and stitch images when needed. Use remote shutter release and wider lenses while avoiding distortion by keeping the camera centered on the subject. Consider photographing details separately and combining shots in editing for full coverage.
Which file formats should I use for archiving and publishing?
Archive original RAW files for full editing flexibility. For publishing, use optimized JPEG or WebP for the web, and high-quality TIFF or PNG for print or cases that require transparency. Keep an organized folder structure and consistent naming for easy retrieval.

